


Brick veneer has been one of the most popular home-building materials over the past three decades because of its timeless, sought-after aesthetic. The material looks like a traditional brick exterior and fits nicely across a home’s interior, exterior, or as an isolated accent wall. It’s also a strong temperature insulator and costs less than stone masonry. On top of those benefits, brick veneer installations are also quicker and easier than setting up traditional brick walls. However, neither home improvement project is a cakewalk, so we’ll tell you how to install brick veneer like a professional.
- How To Install Exterior Brick Veneer? Check Our Step By Step Guide.
- Do You Want To Install Brick Veneer In Your Home? Learn How To Do It.
Thin Brick Veneer Installation
For thin brick veneer installation is best to use the highest-quality brick tiles as they look better and last longer. You will also find more customizable mortar colors, meaning you can find the look that best fits your style. If you want to set your brick veneer up yourself, you’ll need the following special tools, whether you’re installing it inside or outside your home:
- Hammer
- Mortar
- Trowel
- Grout Bag and Bucket
- Level
- Drill
- Ladder or Step Ladder
- Chalk or Pen
- Protective Equipment (gloves, goggles, etc.)
How To Install Exterior Brick Veneer

Installing exterior brick veneer across your home is more demanding and time-consuming than interior home improvement. Not only do you have to work with taller walls and potentially bad weather outside, but you’ll have to spend extra time removing your home’s old siding and installing a moisture barrier. Most people don’t have the time, energy, or patience to do a project this big. However, brick veneer installation is worth the time and energy because of its curb appeal and property value benefits. You will love your home’s new classic appearance, while potential buyers will want to pay extra for that aesthetic if you decide to resell your home. While veneer installations do take time, you’ll finish the project with a short, four-step process.
Step One: Tear Down Old Siding and Install A Moisture Shield
Brick veneer attaches to pre-existing house frames but won’t stick to any existing siding. This means you must remove the old siding before putting the brick veneer layer on your home. Additionally, you’ll need to attach felt paper or a similar moisture barrier to the frame before installing the veneer. This will help to protect your house from inclement weather should it occur before you finish. Brick veneer is a strong temperature insulator and moisture resistor on its own. Still, the additional layer of moisture protection is easy to install and ensures your home won’t weaken or face any damage during Chicago’s rainy season.
Step Two: Mark the Foundation or Moisture Shield
Use your writing utensil to mark guidelines on your moisture barrier or home’s foundation if you’re moving forward without a shield. At a minimum, you’ll want to draw lines directly below your windows and doors so you know where to avoid placing a veneer. If you’re using an angle iron, you’ll need to drill holes in the center one foot apart and mark those holes on your foundation.
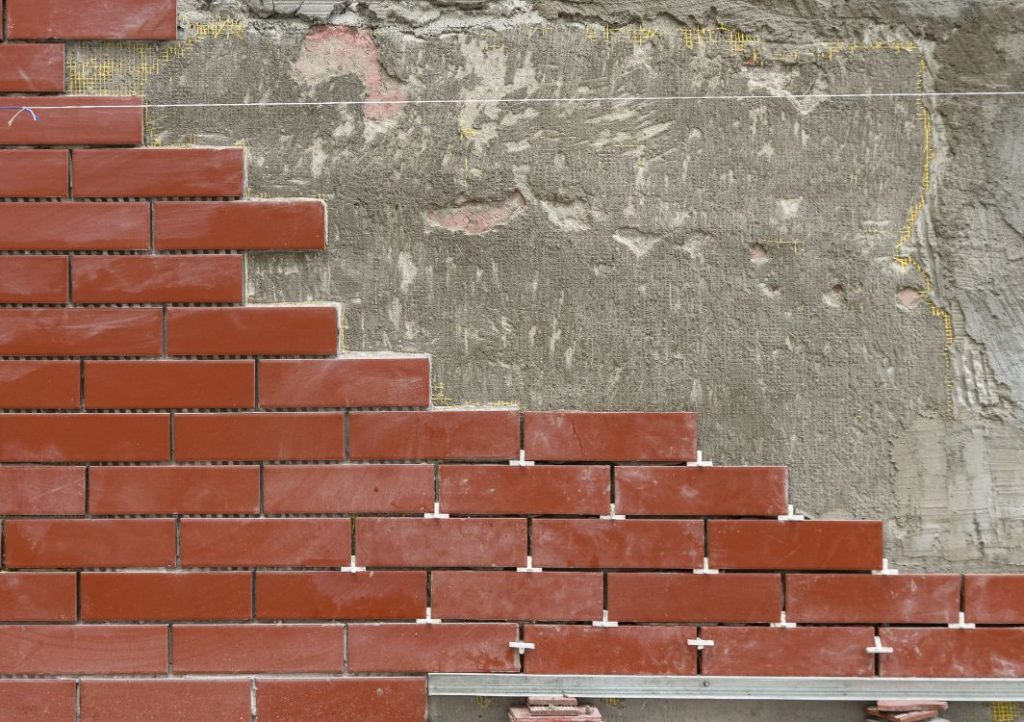
Step Three: Apply Mortar
Mix your mortar in a bucket with water until it reaches a thick but spreadable consistency. Next, starting from the bottom of your foundation, use your trowel to apply a one-inch section of the mortar to the foundation. Mortar is the adhesive keeping your entire wall in place, so it’s crucial to add a sufficient amount. You’ll use the trowel later to remove excess mortar, so don’t worry about using too much.
Step Four: Apply The Brick Veneer
Again beginning at the bottom, press your brick veneer into the mortar-covered wall, using your level to ensure its straightness. Keep a gap of air space between the foundation and the veneer, and gently use your hammer to tap the veneer into place if you can’t do it on your own. Once you finish your first row of brick veneer, use metal ties to anchor the layer of brick to your home’s sheathing or studs. Set an anchor in place every fourth or fifth row and repeat the process across your home, leaving weep holes every two feet for water drainage.
How To Install Brick Veneer in Your Home’s Interior

When you install brick veneer inside your home it is often simpler than exterior installation. This is especially true if you’re only setting up one brick accent wall rather than covering your entire home. You don’t need to remove siding or worry about moisture barriers; however, you will encounter a few unique obstacles worth examining before you begin your renovation.
Step One: Remove Valuable Items and Protect Any Furniture
Installing a brick veneer is a messy job, and while spilled mortar and other debris might not make a difference outdoors, it will permanently damage any furniture or flooring it touches. Therefore, covering your flooring and relocating all your furniture is a vital step in the process. Not only will moving your valuables from the worksite protect them, but it will also give you more space to work and store your materials.
Step Two: Pour Mortar Mixture Into a Grout Bag
Since your interior walls are smaller and more elaborate than those outside, you’ll need more control over where you place your mortar mixture. The best way to gain that control is to pour your mortar mixture into a grout bag and squeeze it out onto your walls.
Step Three: Repeat the Process
While the prep work for installing brick veneer is slightly more tedious than outdoor renovation, the installation process is identical. Follow the final three steps in the exterior directions, and you’ll have your brick veneer walls up in a few days (depending on your project size.)
Even when you know how to install brick veneer walls and have the proper tools, the process is far from simple. That’s why it is worth considering help offered by expert masonry contractors Chicago; they can bring gorgeous brick walls to your home in as hassle-free a way as possible.